South Scorecard
1
| Tee | Yardage | Par | Handicap |
|---|---|---|---|
| Blue | 505 | 5 | 4 |
| White | 475 | 5 | 4 |
| Yellow | 400 | 5 | 4 |
| Red | 390 | 5 | 4 |
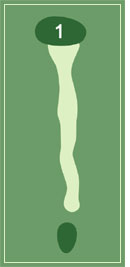
This is a reachable par five with a large, nicely shaped green.
2
| Tee | Yardage | Par | Handicap |
|---|---|---|---|
| Blue | 340 | 4 | 14 |
| White | 320 | 4 | 14 |
| Yellow | 275 | 4 | 14 |
| Red | 260 | 4 | 14 |
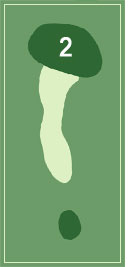
Number two is a short dogleg to the right. The green makes this hole difficult because balls tend to hit and roll through the green where there is a substantial drop off.
3
| Tee | Yardage | Par | Handicap |
|---|---|---|---|
| Blue | 340 | 4 | 14 |
| White | 320 | 4 | 14 |
| Yellow | 275 | 4 | 14 |
| Red | 260 | 4 | 14 |
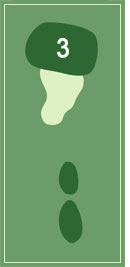
The hole handicap won’t indicate this, but number three is probably the toughest hole to par on the course. It is a long par three, especially from the blue tees, with water along the entire right side. The undulating green is guarded by two bunkers, but there is plenty of room to the left.
4
| Tee | Yardage | Par | Handicap |
|---|---|---|---|
| Blue | 320 | 4 | 10 |
| White | 280 | 4 | 10 |
| Yellow | 225 | 4 | 10 |
| Red | 210 | 4 | 10 |
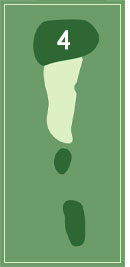
The fourth hole comes out of the trees to a wide open fairway, which slopes right to left for the entire hole. This green is dangerous on the left side, where is slopes severely toward the river.
5
| Tee | Yardage | Par | Handicap |
|---|---|---|---|
| Blue | 475 | 5 | 2 |
| White | 460 | 5 | 2 |
| Yellow | 440 | 5 | 2 |
| Red | 350 | 5 | 2 |
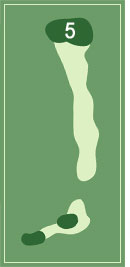
Number five is a short par five dogleg left that features breathtaking views of the Huron River. If you can hit a draw around the corner, it is possible to reach this green in two.
6
| Tee | Yardage | Par | Handicap |
|---|---|---|---|
| Blue | 370 | 4 | 8 |
| White | 350 | 4 | 8 |
| Yellow | 235 | 4 | 8 |
| Red | 225 | 4 | 8 |
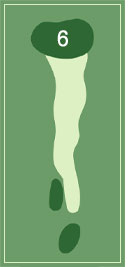
The landing area isn’t visible from the tee of the par-four sixth, but it is to your advantage to aim down the right side since the fairway slopes left. Stopping the ball on this shallow, elevated green requires a near perfect shot.
7
| Tee | Yardage | Par | Handicap |
|---|---|---|---|
| Blue | 120 | 3 | 18 |
| White | 100 | 3 | 18 |
| Yellow | 100 | 3 | 18 |
| Red | 60 | 3 | 18 |
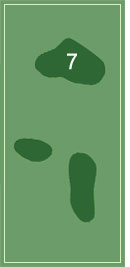
This is our signature hole at the South Course. What makes this par three such a beautiful hole is the lake that you must hit over to reach the green. The seventh hole isn’t long, but that doesn’t mean it’s easy!
8
| Tee | Yardage | Par | Handicap |
|---|---|---|---|
| Blue | 350 | 4 | 12 |
| White | 315 | 4 | 12 |
| Yellow | 305 | 4 | 12 |
| Red | 280 | 4 | 12 |
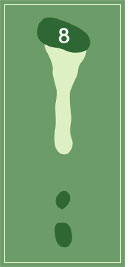
The eighth hole is uphill all the way. This is a short par four, and it offers a good chance for a birdie.
9
| Tee | Yardage | Par | Handicap |
|---|---|---|---|
| Blue | 380 | 4 | 6 |
| White | 360 | 4 | 6 |
| Yellow | 275 | 4 | 6 |
| Red | 275 | 4 | 6 |
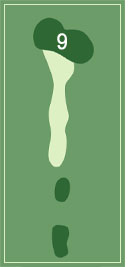
The downhill tee shot on the ninth must be center cut. Two creeks pinch the fairway to about fifteen yards wide in the landing area. From there it’s an uphill shot to a small green.
10
| Tee | Yardage | Par | Handicap |
|---|---|---|---|
| Blue | 540 | 5 | 3 |
| White | 510 | 5 | 3 |
| Yellow | 420 | 5 | 3 |
| Red | 410 | 5 | 3 |
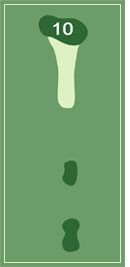
The tenth is a long par five with an intimidating downhill tee shot. Similar to number nine, two creeks pinch the landing area to about twenty yards wide. A little farther to the right, but still in play off the tee is a good-sized pond, which also comes into play later in the round.
11
| Tee | Yardage | Par | Handicap |
|---|---|---|---|
| Blue | 415 | 4 | 7 |
| White | 395 | 4 | 7 |
| Yellow | 380 | 4 | 7 |
| Red | 300 | 4 | 7 |
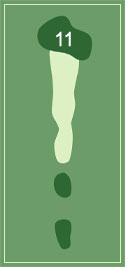
This is a beautiful and long par four with a tree-lined right side and two creeks that come into play on the first shot. Use one more club than you normally would for the approach because it’s up hill all the way.
12
| Tee | Yardage | Par | Handicap |
|---|---|---|---|
| Blue | 135 | 3 | 17 |
| White | 135 | 3 | 17 |
| Yellow | 120 | 3 | 17 |
| Red | 105 | 3 | 17 |
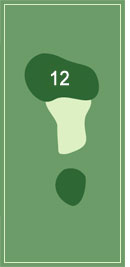
The third hole on this nine is a par three tucked nicely within some very large trees. Don’t go long on this one because you’ll find yourself in some knee-high grass chipping to a green that runs away from you.
13
| Tee | Yardage | Par | Handicap |
|---|---|---|---|
| Blue | 350 | 4 | 9 |
| White | 335 | 4 | 9 |
| Yellow | 310 | 4 | 9 |
| Red | 295 | 4 | 9 |
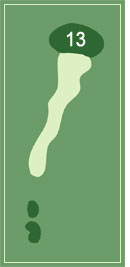
The only trouble from the tee on the thirteenth is the woods that borders the left side. There is plenty of room to bail out to the right, and there is even a mound that is likely to kick your ball back into the fairway if you do end up slicing it. Make sure to pay attention to the pin location on thirteen because this green is very deep!
14
| Tee | Yardage | Par | Handicap |
|---|---|---|---|
| Blue | 455 | 5 | 5 |
| White | 455 | 5 | 5 |
| Yellow | 420 | 5 | 5 |
| Red | 405 | 5 | 5 |
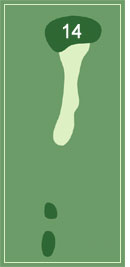
Fourteen is a short, dogleg-left, par five. If you get greedy and try to cut the corner, you’ll probably find yourself in the midst of some very densely planted pine trees.
15
| Tee | Yardage | Par | Handicap |
|---|---|---|---|
| Blue | 180 | 3 | 15 |
| White | 155 | 3 | 15 |
| Yellow | 130 | 3 | 15 |
| Red | 130 | 3 | 15 |
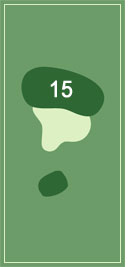
This hole is a downhill par three with a wonderful view of the river in the background. Anything long here is sure to roll down the slope into the hazard.
16
| Tee | Yardage | Par | Handicap |
|---|---|---|---|
| Blue | 335 | 4 | 13 |
| White | 305 | 4 | 13 |
| Yellow | 240 | 4 | 13 |
| Red | 230 | 4 | 13 |
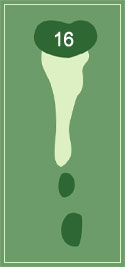
You can get one stroke back on this hole if you don’t do anything silly. Sixteen is a very straightforward medium-length par four.
17
| Tee | Yardage | Par | Handicap |
|---|---|---|---|
| Blue | 310 | 4 | 11 |
| White | 310 | 4 | 11 |
| Yellow | 295 | 4 | 11 |
| Red | 280 | 4 | 11 |
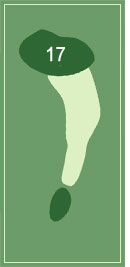
Don’t let the yardage fool you, this can be a very difficult hole. This is a downhill dogleg left with pine trees up the left side and a pond on the right.
18
| Tee | Yardage | Par | Handicap |
|---|---|---|---|
| Blue | 445 | 4 | 1 |
| White | 420 | 4 | 1 |
| Yellow | 355 | 4 | 1 |
| Red | 345 | 4 | 1 |
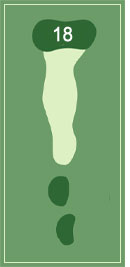
The final hole is the longest and most challenging par four on the course. You can’t see the fairway from the tee, but anything down the middle is going to bounce left. There is a creek running through the fairway and a pond to the right that come into play on the second shot. The slope of the fairway will cause you to have a downhill lie for your approach to this green.
